Topic
How to add new contacts to a public or private Nixle group individually or in bulk.
Description
| NOTE: |
|
These group management features are only available on the Nixle Engage and Nixle 360 platforms.
|
Once you've created a public or private group, contacts can be added individually or in bulk. The below examples demonstrate the various ways Nixle allows you to accomplish this. For troubleshooting steps on contact uploads, see knowledge article Nixle: Troubleshooting Failed Nixle Contact Uploads.
Adding Contacts by Upload on the Nixle Engage Platform
To upload multiple contacts to a group using a template, please follow the steps listed below:
- Log in to your agency at agency.nixle.com.
- Choose Collect Contacts from the menu bar.
- Choose Download Template to download a pre-formatted CSV file.
- Enter each of the contacts and their information in the corresponding columns.
- Mobile phone numbers must be in XXX-XXX-XXXX format.
- Leave the Home Phone Number (Voice) column blank as the voice dialing feature is not available for the Nixle Engage platform. Any number entered into this column will not display in the contact's information upon upload.
- Including a contact's name and ZIP code is optional, but an email address or a mobile phone number is required for each entry.
- Save and name the file after entering all contact information.
- From the Select a Group drop-down menu, choose the group to upload the contacts to.
- Choose Upload File.
- Review the terms for importing contacts, and check the "I have reviewed the rules..." checkbox to indicate you are ready to proceed. Then choose the I agree with the terms or Cancel button to proceed.
- Click Choose File, locate the CSV file containing your contact information on your computer and click Open.
- Checking the checkbox next to Overwrite existing contacts will replace any existing contacts that belong to the group you are adding to.
- Choose Continue.
- Confirmation emails confirming the contact upload and the import will be sent to the account administrator.
|
Adding Contacts by Input on the Nixle Engage Platform
To add a single or multiple contacts to a group by inputting information, please follow the steps listed below:
- Log in to your agency at agency.nixle.com.
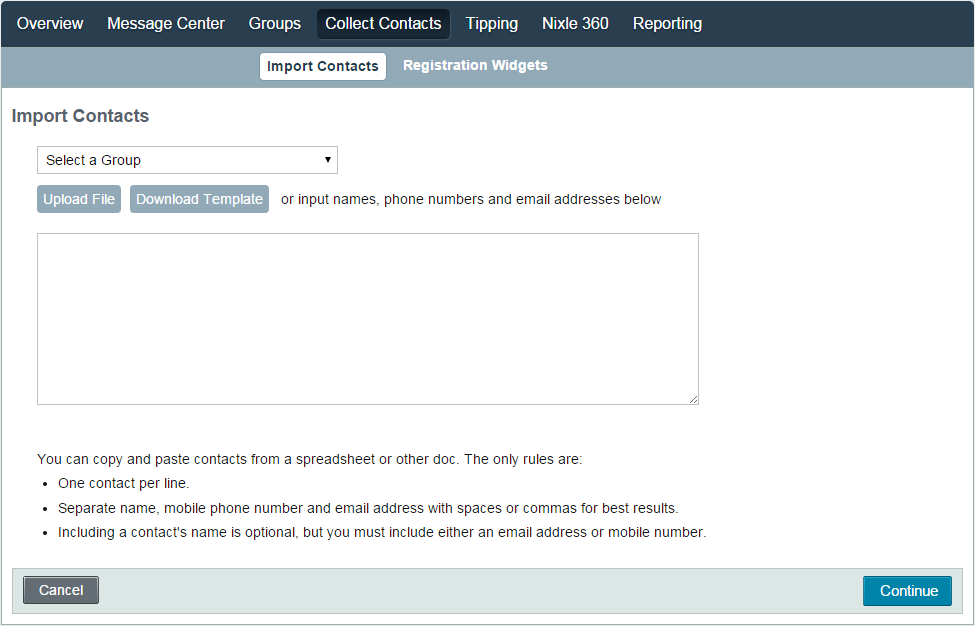
- Choose Collect Contacts from the menu bar.
- From the Select a Group dropdown menu, choose the group to add contacts to.
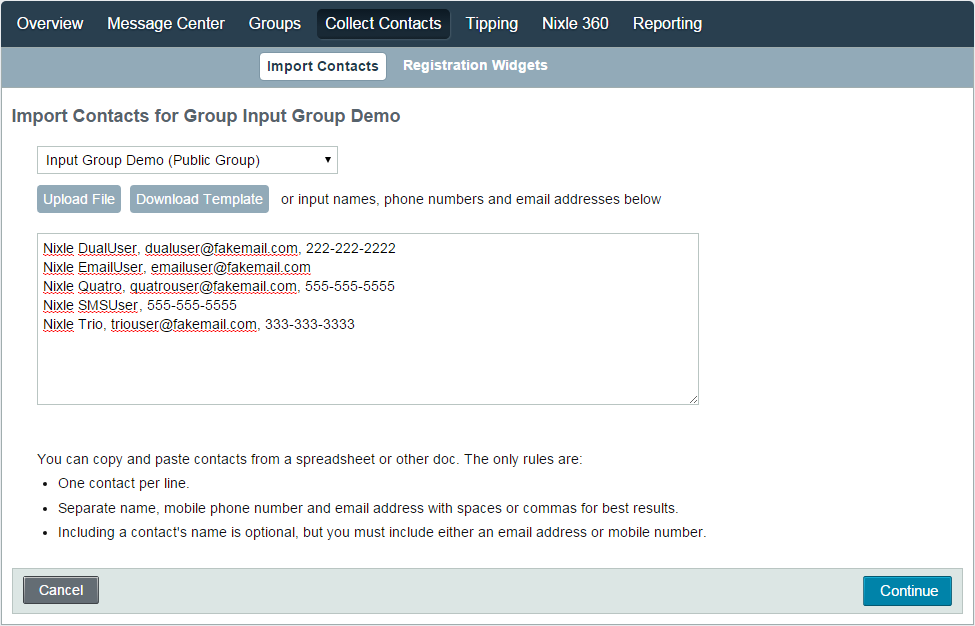
- Input, or copy and paste, the contact information in the text field. Please be aware of the following:
- Only one contact's information can be entered per line.
- Separate the contact's name, mobile phone number and email address with a space or a comma.
- Including a contact's name is optional, but an email address or a mobile phone number is required for each entry.
- Choose Continue when all contact information has been entered.
|
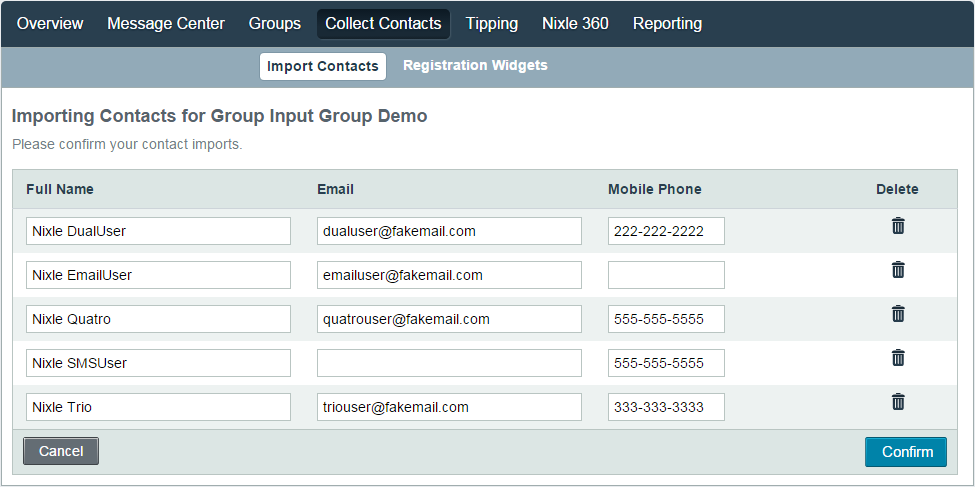
- If needed, you can make any adjustments to the contact information in the text fields before adding the contacts to the group.
- To delete a contact entirely, select the
 icon and choose Okay. icon and choose Okay.
- Choose Confirm.
- Check the checkbox after reviewing the contract import agreement, and choose Continue.
|
Adding Contacts by Upload on the Nixle 360 Platform
To upload multiple contacts to a group using a template, please follow the steps listed below:
- Log in to your agency at agency.nixle.com.
- Choose Collect Contacts from the menu bar.
- Choose Download Template to download a pre-formatted CSV file.
- Enter each of the contacts and their information in the corresponding columns.
- Phone numbers must be entered in XXX-XXX-XXXX format.
- Ensure the home phone and mobile phone numbers are entered into the appropriate columns for voice calling to contact the home phone number.
- Including a contact's name and ZIP code is optional, but an email address, mobile number or home phone number is required for each entry.
- Save and name the file after entering all contact information.
- From the Select a Group dropdown menu, choose the group to upload the contacts to.
- Choose Upload File.
- Review the terms for importing contacts, and check the "I have reviewed the rules..." checkbox to indicate you are ready to proceed. Then choose the I agree with the terms or Cancel button to proceed.
- Click Choose File, locate the CSV file containing your contact information on your computer and click Open.
- Choose Continue.
- Confirmation emails confirming the contact upload and the import will be sent to the account administrator.
|
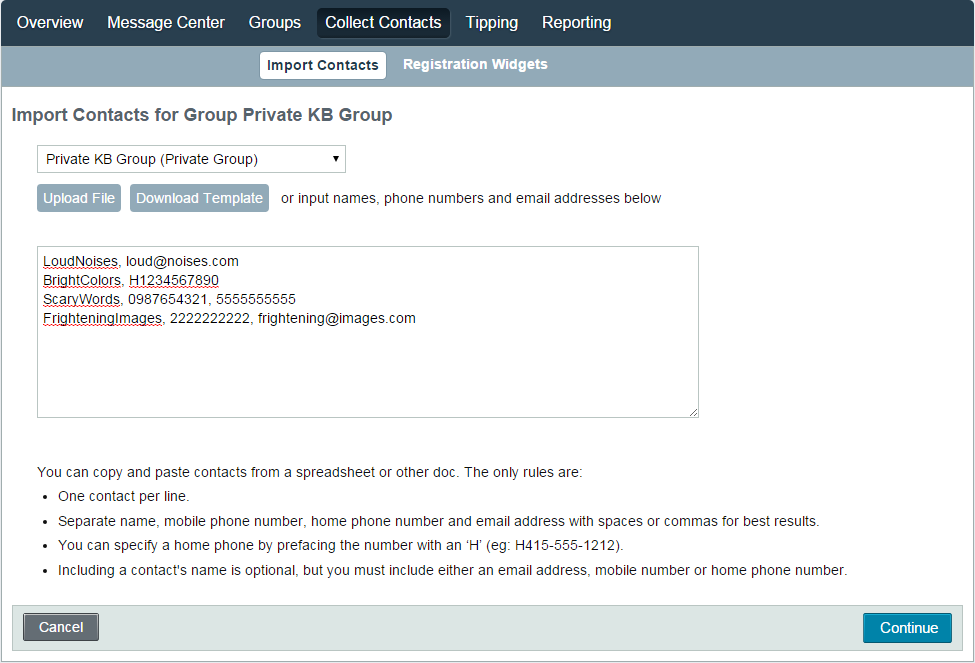
Adding Contacts by Input on the Nixle 360 Platform
To add a single or multiple contacts to a group by inputting information, please follow the steps listed below:
- Log in to your agency at agency.nixle.com.
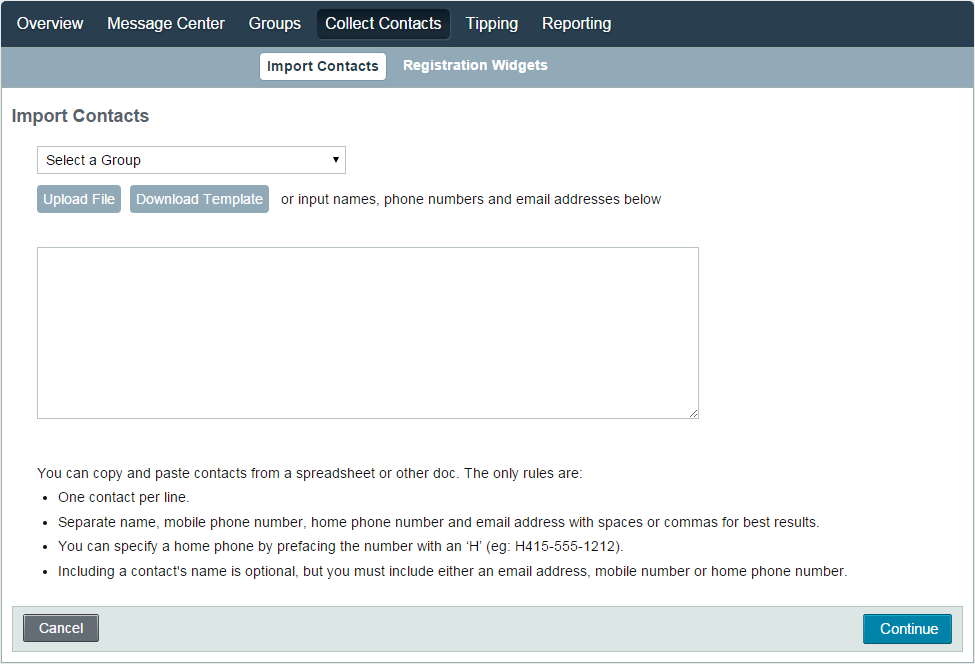
- Choose Collect Contacts from the menu bar.
- From the Select a Group dropdown menu, choose the group to add contacts to.
- Input, or copy and paste, the contact information in the text field. Please be aware of the following:
- Only one contact's information can be entered per line.
- Separate the contact's name, mobile phone number, home phone number and email address with a space or a comma.
- Specify the home phone number by prefacing the number with H (i.e., H123-456-7890).
- If only one unspecified phone number is entered for a contact it will be entered as the mobile phone value.
- If two unspecified phone numbers are entered for a contact, the first number will be the mobile phone value, and the second number will be the home phone value.
- Including a contact's name is optional, but an email address, mobile phone number or home phone number is required for each entry.
- Choose Continue when all contact information has been entered.
|
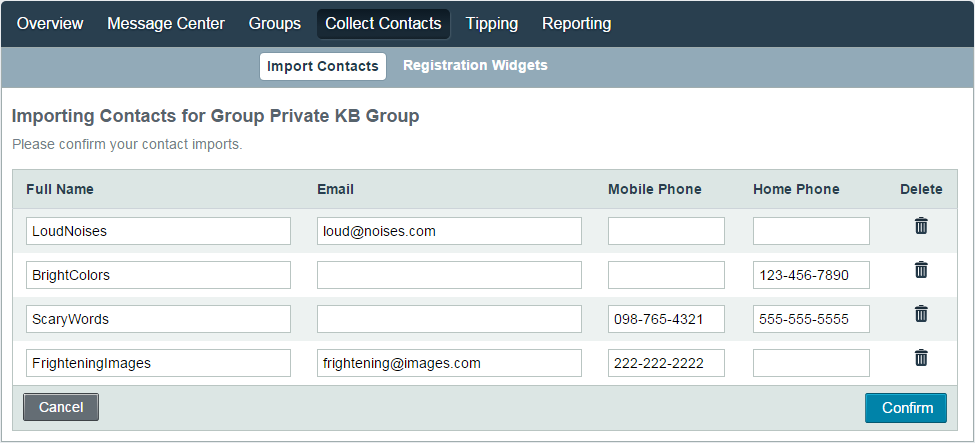
- If needed, you can make any adjustments to the contact information in the text fields before adding the contacts to the group.
- To delete a contact entirely, select the
 icon and choose Okay. icon and choose Okay.
- Choose Confirm.
- Check the checkbox after reviewing the contract import agreement, and choose Continue.
|
Comments
0 commentsArticle is closed for comments.